Regards Mick.
Heres a trick I've used with wood screws so they come out.
Melt some candle wax in a pan and toss the screws in. Fish them
out, a fork works ok and let em cool. Now they won't get stuck in
the resin.
Coogs
Jodie's T-V
-
tx river rat
- Posts: 989
- Joined: Wed Feb 21, 2007 10:48 pm
- Type of boat I like: <-- Please read instructions to the left and delete this text. Then, tell us what type boat you like! :-)
- Location: Tx
-
Oldsparkey
- Design Reviewer
- Posts: 1272
- Joined: Sat Jun 19, 2004 11:08 am
- Type of boat I like: Wood boats .
- Location: Somewhere around Central Florida
- Contact:
Just kicking an idea around.
On a thicker piece of wood they run a bunch of saw cut on the inside so they can bend the wood to the shape they want. It removes a amount of the wood which would be compressed in the bending process.
I was wondering if a razor knife and a bunch of small cuts ( not going all the way threw the wood ) with it would let the wood bend easier. then epoxy the outside to shape it and epoxy the inside to seal it before attaching it the the boat.
It should relieve any tendencies for the wood to try to spring back to the original flat shape.
Using the thinner wood that we work with , most of the time we can just (carefully ) bend it to shape or to the almost shape we want.
Chuck.
Remember:
Amateurs built the Ark...... Professionals built the Titanic
Visit some fine paddlers at The Southern Paddler
Amateurs built the Ark...... Professionals built the Titanic
Visit some fine paddlers at The Southern Paddler
-
hairymick
- Design Reviewer
- Posts: 1965
- Joined: Wed Jan 04, 2006 8:54 am
- Type of boat I like: <-- Please read instructions to the left and delete this text. Then, tell us what type boat you like! :-)
- Location: Queensland, Australia
- Contact:
G'day Jack,
 The decks are only an experiment but seem to work with this hull OK.
G'day Coogs,

G'day Ron,
Thinking about this, I will be putting coaming lips on each deck similar to my kayak coamings.
I marked and cut them all yesterday. Normally this has been a real chore for me and when glued in place have ALWAYS required a LOT of sanding, after they were glued onto the boat.
Yesterday, I tried something different. I marked, cut and trimmed one coaming piece to exactly the shape I wanted, then used it as a template to mark all the other layers. Rough cut them then screwed the template piece to them and ran around them with the router and pattern bit. Took only about an hour to cut all pieces exactly the same and with a little care when laminating should cut several hours of sanding later on.
What I am thinking of doing is to glue up a couple of built up coaming pieces onto the deck while it is place there now and this should help it hold its shape when I take it off to fibre-glass the underneath side. - thoughts?
G;day Chuck,
At the pointy ends of the decks, they are impossible to get any curve into.
It is a little late to try something on this boat but will try some shallow cuts on the underside of the decks on the next one. Thank you.
My timber supplier snuck into my last order 3 sheets of 3mm GaboonOkoume into my order of 4mm ply. I was as mad as hell at the time but I don't think I would have been able to bend the 4mm stuff as much as I have in the decks of this boat. So it has worked out pretty well.

I think so too mate. I dithered for some time before settling on this boat for Jodie. I think it will probably best suit her needs and be a good compromise between load carrying capacity/beam, boat weight and performance. The fact that the hull is so elegant, while at the same time, simple to build, is a bonus.A decked canoe is a very versatile craft. A solo that can be put into service by taking along a friend is even more versatile. Jodie will be able to paddle a lot of kinds of water with that boat
Thank you mate. That is a very big compliment.Matt & Mick - you make a good pair.
G'day Coogs,
Good tip mate - thanksHeres a trick I've used with wood screws so they come out.
Melt some candle wax in a pan and toss the screws in. Fish them
out, a fork works ok and let em cool. Now they won't get stuck in
the resin
G'day Ron,
Another good tip, thank you.I attach a piece of wood straight across the open end of the deck to help hold the shape, also if you need more help out in the middle of the deck
a small hole on each side and a wire ran from side to side will let you hold are adjust the shape after you pull off the deck
Thinking about this, I will be putting coaming lips on each deck similar to my kayak coamings.
I marked and cut them all yesterday. Normally this has been a real chore for me and when glued in place have ALWAYS required a LOT of sanding, after they were glued onto the boat.
Yesterday, I tried something different. I marked, cut and trimmed one coaming piece to exactly the shape I wanted, then used it as a template to mark all the other layers. Rough cut them then screwed the template piece to them and ran around them with the router and pattern bit. Took only about an hour to cut all pieces exactly the same and with a little care when laminating should cut several hours of sanding later on.
What I am thinking of doing is to glue up a couple of built up coaming pieces onto the deck while it is place there now and this should help it hold its shape when I take it off to fibre-glass the underneath side. - thoughts?
G;day Chuck,
More genius mate.On a thicker piece of wood they run a bunch of saw cut on the inside so they can bend the wood to the shape they want. It removes a amount of the wood which would be compressed in the bending process
At the pointy ends of the decks, they are impossible to get any curve into.
It is a little late to try something on this boat but will try some shallow cuts on the underside of the decks on the next one. Thank you.
My timber supplier snuck into my last order 3 sheets of 3mm GaboonOkoume into my order of 4mm ply. I was as mad as hell at the time but I don't think I would have been able to bend the 4mm stuff as much as I have in the decks of this boat. So it has worked out pretty well.
Regards,
Mick
JEMWATERCRAFT Swampgirl; Wadefish;Touring Pirogue;South Wind; P5 ;
Laker X 2, Sasquatch 16.5 T-V 15 Okwata 15:
Cobia 15 (under construction)
Mick
JEMWATERCRAFT Swampgirl; Wadefish;Touring Pirogue;South Wind; P5 ;
Laker X 2, Sasquatch 16.5 T-V 15 Okwata 15:
Cobia 15 (under construction)
-
hairymick
- Design Reviewer
- Posts: 1965
- Joined: Wed Jan 04, 2006 8:54 am
- Type of boat I like: <-- Please read instructions to the left and delete this text. Then, tell us what type boat you like! :-)
- Location: Queensland, Australia
- Contact:
Not much to report,
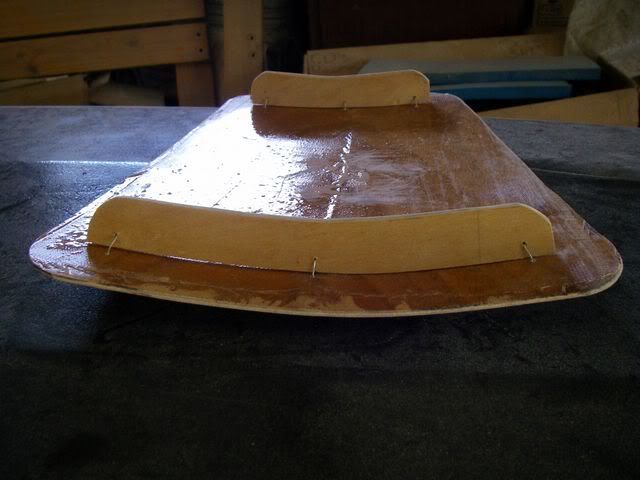
Playing with hatches and such. I call em fiddly bits. Things where a lot of time can be put in for little result to be seen.
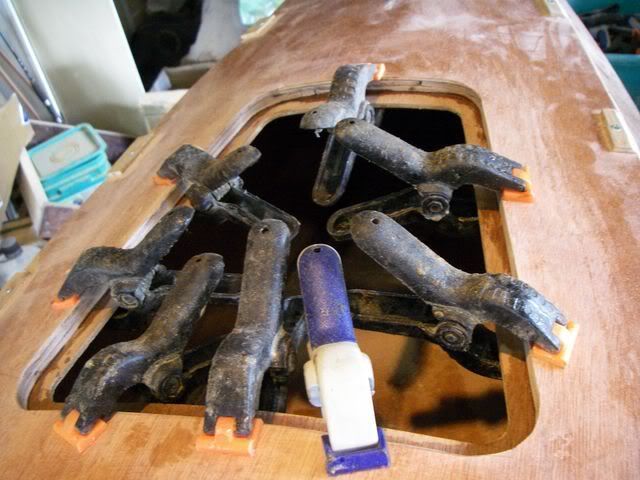
Cut the hole in the back deck for the hatch, made up some layers for the hatch coaming. Started glueing them in.
Also doing a sort of mini coaming across the front of the rear deck.
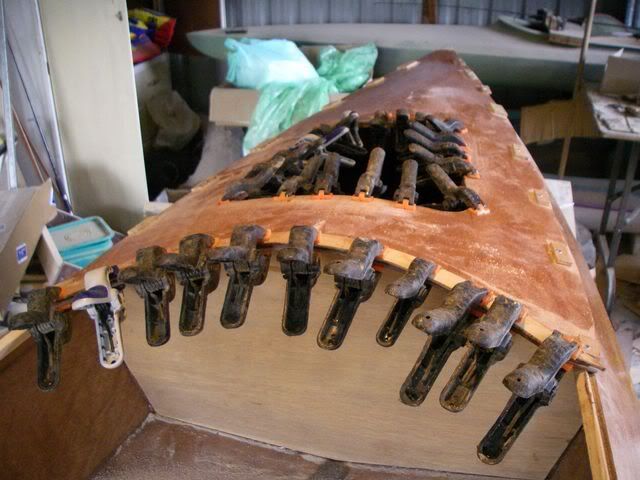
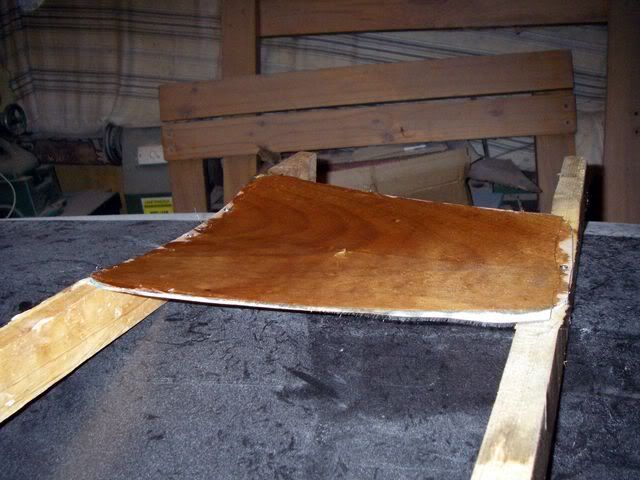
When I cut the hole for the hatch, I half expected (hoped) the resin on top would have held it pretty close to shape. Not to be. It went allmost flat as soon as the tension was released.
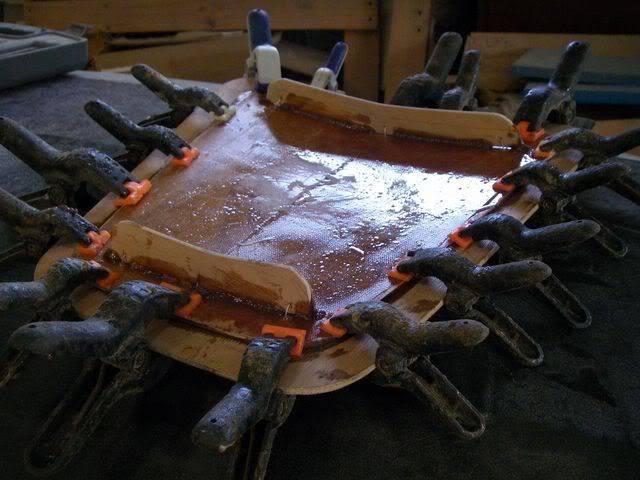
Reverted back to Matt's idea for the decks on another Kayak and made female frames to hold the hatch lid in shape while I applied resin and fibre - glass to the concave surface of the inside. Again, Matt was right and I was wrong.
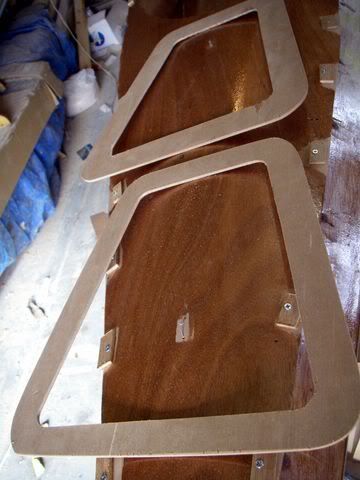
While I was playing with the saw did a couple of these.
Playing with hatches and such. I call em fiddly bits. Things where a lot of time can be put in for little result to be seen.
Cut the hole in the back deck for the hatch, made up some layers for the hatch coaming. Started glueing them in.
Also doing a sort of mini coaming across the front of the rear deck.
When I cut the hole for the hatch, I half expected (hoped) the resin on top would have held it pretty close to shape. Not to be. It went allmost flat as soon as the tension was released.
Reverted back to Matt's idea for the decks on another Kayak and made female frames to hold the hatch lid in shape while I applied resin and fibre - glass to the concave surface of the inside. Again, Matt was right and I was wrong.
While I was playing with the saw did a couple of these.
Regards,
Mick
JEMWATERCRAFT Swampgirl; Wadefish;Touring Pirogue;South Wind; P5 ;
Laker X 2, Sasquatch 16.5 T-V 15 Okwata 15:
Cobia 15 (under construction)
Mick
JEMWATERCRAFT Swampgirl; Wadefish;Touring Pirogue;South Wind; P5 ;
Laker X 2, Sasquatch 16.5 T-V 15 Okwata 15:
Cobia 15 (under construction)
-
hairymick
- Design Reviewer
- Posts: 1965
- Joined: Wed Jan 04, 2006 8:54 am
- Type of boat I like: <-- Please read instructions to the left and delete this text. Then, tell us what type boat you like! :-)
- Location: Queensland, Australia
- Contact:
Rounded decks are a PITA!!
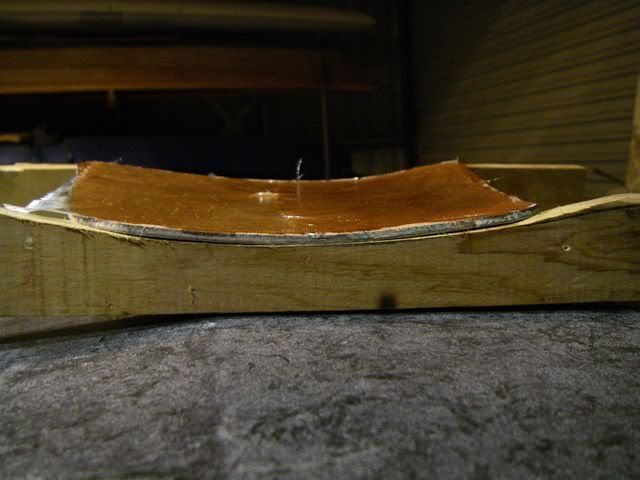
Hatch lid was still not curved enough this morning to match the deck.
Hatch lid, try 3.
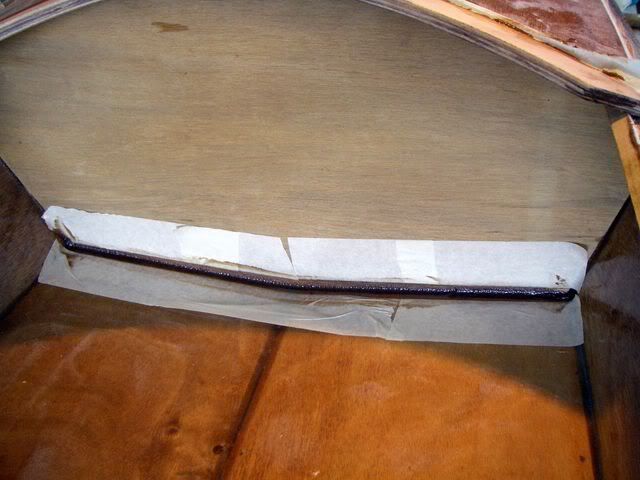
Glued the sealing lip on while I was at it.
And the inside seal lip on the hatch hole.
Did a lil filleting with left over wood flour,
Hatch lid was still not curved enough this morning to match the deck.
Hatch lid, try 3.
Glued the sealing lip on while I was at it.
And the inside seal lip on the hatch hole.
Did a lil filleting with left over wood flour,
Regards,
Mick
JEMWATERCRAFT Swampgirl; Wadefish;Touring Pirogue;South Wind; P5 ;
Laker X 2, Sasquatch 16.5 T-V 15 Okwata 15:
Cobia 15 (under construction)
Mick
JEMWATERCRAFT Swampgirl; Wadefish;Touring Pirogue;South Wind; P5 ;
Laker X 2, Sasquatch 16.5 T-V 15 Okwata 15:
Cobia 15 (under construction)
-
Oldsparkey
- Design Reviewer
- Posts: 1272
- Joined: Sat Jun 19, 2004 11:08 am
- Type of boat I like: Wood boats .
- Location: Somewhere around Central Florida
- Contact:
Mick....
I haven't done a rounded hatch but am thinking that if the deck was positioned where you want it. Then glassed on the inside and outside , the way you would do a solid deck.
Now drill 5 or 6 ... 1/16th holes in a line and with a fine pointed saw cut (the Previousley marked ) deck out. Now attach the sealing lip to the inside /under side of the deck and the hatch cover would hold it's shape and fit like a glove.
Chuck.
Remember:
Amateurs built the Ark...... Professionals built the Titanic
Visit some fine paddlers at The Southern Paddler
Amateurs built the Ark...... Professionals built the Titanic
Visit some fine paddlers at The Southern Paddler
-
jem
- Site Admin
- Posts: 4916
- Joined: Fri Jun 18, 2004 8:14 pm
- Type of boat I like: Wooden
- Location: Greensboro, NC
- Contact:
I tried to make a rounded hatch without any internal stiffeners. My idea was to make the lip a little smaller and forced the hatch lid to bend around it. Didn't work consistently.
I were to do it again, I'd try some kerf slits to make the plywood hatch cover more flexible. Then maybe the hatch would stay bent.
But I personally like the stiffeners because you can drill a hole through them and have a spot to lash a hatch-keeper bungee.
Another alternative would be to make the hatch cover out of strips of ply or lumber. But that might look funny.
-Matt. Designer.
-
Kayak Jack
- Design Reviewer
- Posts: 1186
- Joined: Sun Jun 20, 2004 8:03 pm
- Type of boat I like: <-- Please read instructions to the left and delete this text. Then, tell us what type boat you like! :-)
- Location: South-central Michigan
Matt,
Would it be easier to have a pointed deck, vee in cross-section? The hatch would be easier, it seems. An upside down vee can easily be braced and stiffened from underneath with short cross pieces glued from side to side up near the centerline. I use strips about 8" X 1".
Also, with a vee deck you can vary the width of a cut out and fill in of a long, narrow triangle up the centerline to achieve a foredeck that is even with the top of the bow in front, lower in the middle, and higher as it meets the front edge of the cockpit. This slightly swayback deck sheds water considerably better than a rounded deck.
Kayak Jack
Doing what you like is FREEDOM
Liking what you do is HAPPINESS
I spent most of my money on whiskey and women - and I'm afraid I just wasted the rest.
Doing what you like is FREEDOM
Liking what you do is HAPPINESS
I spent most of my money on whiskey and women - and I'm afraid I just wasted the rest.