Page 2 of 8
Posted: Thu Feb 28, 2008 5:07 pm
by Kayak Jack
One of these days, I'm gong to have to climb onto one of these sit-on-tops. As of now, I'm not used to seeing a plywood mortar box inside a boat. I think, though, I'd really like the self-bailing feature.
Posted: Thu Feb 28, 2008 11:06 pm
by scottrunnr
The self-bailing is amazing. This fall I was out in our tandem SOT that Matt designed. We were fishing right on the edge of a shelf when a large ferry roared past and threw up 6' wave which broke on us because we were right on the shelf. While the kayak rode over most of the wave, the breaking aspect of the wave dumped into the cockpit. It was pretty near filled up. However, it emptied itself out completely in under 20 seconds. That was a very good test and it performed beautifully!
Posted: Fri Feb 29, 2008 1:15 am
by LEE SCHNEIDERMANN
Posted: Thu Mar 06, 2008 12:27 am
by scottrunnr
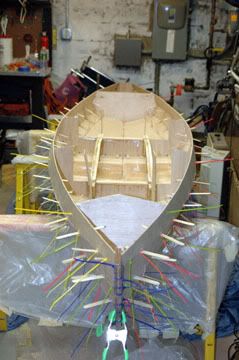
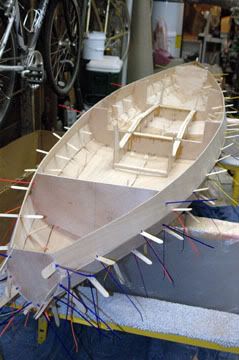
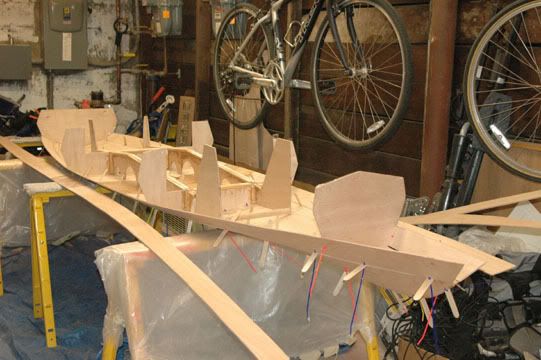
I managed to get a bit more work done. The cockpit exterior has just been glassed and two sets of hull panels have been stitched to the frame.
Cockpit exterior just glassed with one coat epoxy (it's still wet)
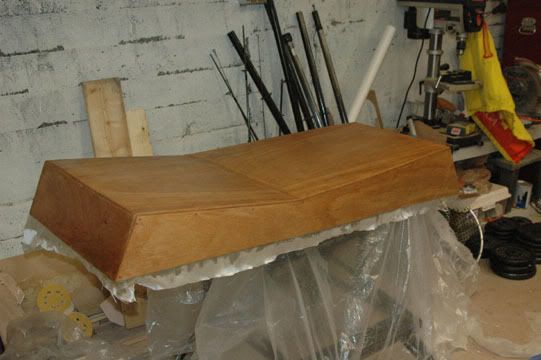
I decided to try making the foredeck out of one piece of plywood with a curved shape. Thought it might look nicer...we'll see if I succeed. Note the front cockpit wall is curved and has "ears".
 Two sets of hull panels stitched to the frames
Posted: Tue Mar 11, 2008 8:08 pm
by scottrunnr
Posted: Thu Mar 13, 2008 9:51 am
by scottrunnr
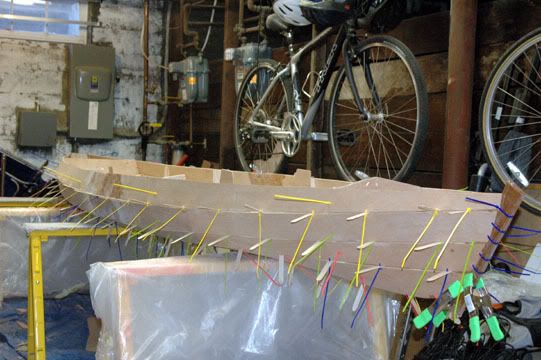
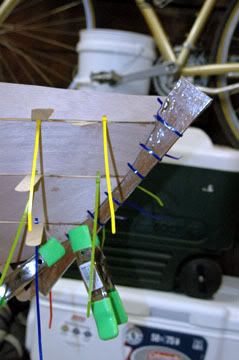
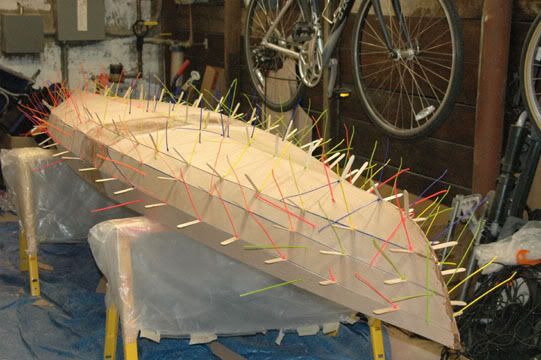
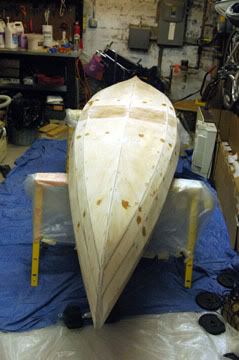
Hull is flipped and ready for filleting/blue tape. I definately have a little twist towards the stern. Does anyone have any suggestions for how to get the twist out?
Ready to fillet

Posted: Thu Mar 13, 2008 12:53 pm
by jem
If the horses are level in relation to each other, you should be able to bully the twist out. Might need some straps or weights to hold it in place while the out hull fillets cure.
I'd take it off the horses, and try to twist the opposite direction. Use 2 people for this. Might have to over-compensate a bit to get it to where you want it. If it's stubborn, you might need to cut a few stitches loose.
Posted: Sat Mar 15, 2008 10:19 pm
by scottrunnr
Thanks Matt. Cutting some of the stitches and bullying it a bit did the trick!
Posted: Fri Mar 21, 2008 3:00 pm
by scottrunnr
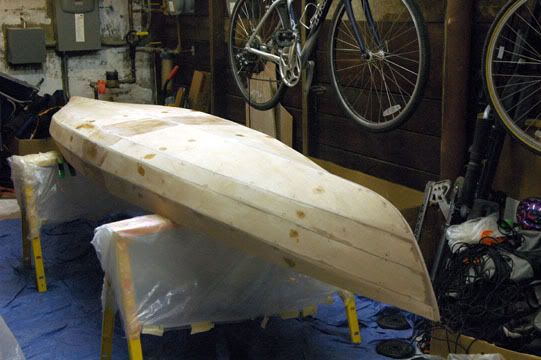
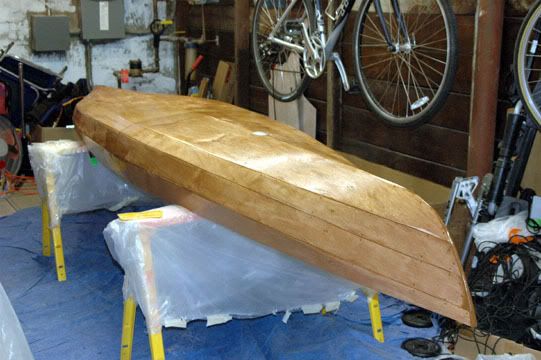
I made some good progress this week. The hull has been fillet'd and a saturation coat applied. I also pre-staged the area for my depth sounder. I cut the area out of the hull and filled it with an epoxy/collidial silica mix. The folks at West Systems tell me the depth sounder can shoot thru it. This way I can fiberglass right over it. See photos below. I hope to glass the hull exterior this weekend.
1. Hull fillet'd
2. Hole cut in hull for depth sounder and covered with plastic sheet and packing tape on exterior.
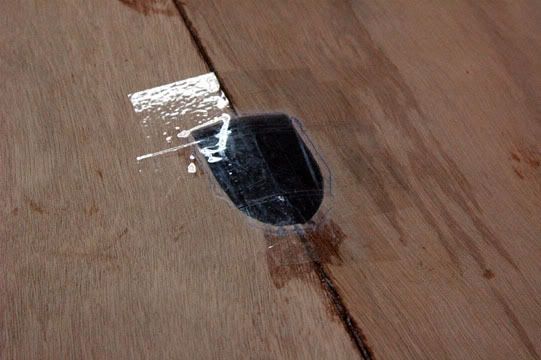
3. I beveled the interior side of the hole so the epoxy/silica had something to grab onto.
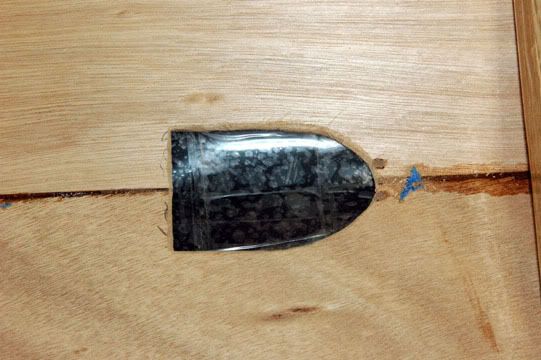
4. Depth sounder hole filled with epoxy/silica (interior view).
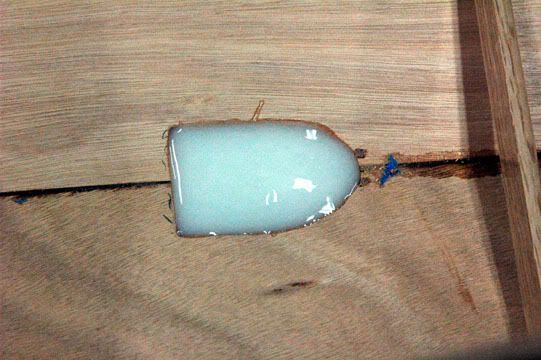
5. View from exterior of the depth sounder hole cured after removing tape/plastic and sanding.
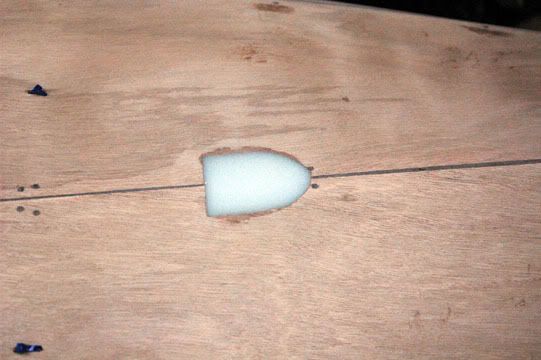
6. Hull after saturation coat (note white spot slightly forward of midships for depth sounder)

Posted: Fri Mar 21, 2008 3:48 pm
by Oldsparkey
She is looking good , really good.

It is always a pleasure to see a hand crafted boat coming together and looking so nice. The grain of the wood sure stands out and you will have one beautiful boat that folks will admire.
Chuck.