making a hatch
-
hairymick
- Design Reviewer
- Posts: 1965
- Joined: Wed Jan 04, 2006 8:54 am
- Type of boat I like: <-- Please read instructions to the left and delete this text. Then, tell us what type boat you like! :-)
- Location: Queensland, Australia
- Contact:
G'day Doug,
Do you have anything specific in mind?
We all have different ideas on what make a good hatch.
Really, they are a PITA to do well. Very time consuming. Most blokes seem happy enough to buy one ready made and install it.
Do you have anything specific in mind?
We all have different ideas on what make a good hatch.
Really, they are a PITA to do well. Very time consuming. Most blokes seem happy enough to buy one ready made and install it.
Regards,
Mick
JEMWATERCRAFT Swampgirl; Wadefish;Touring Pirogue;South Wind; P5 ;
Laker X 2, Sasquatch 16.5 T-V 15 Okwata 15:
Cobia 15 (under construction)
Mick
JEMWATERCRAFT Swampgirl; Wadefish;Touring Pirogue;South Wind; P5 ;
Laker X 2, Sasquatch 16.5 T-V 15 Okwata 15:
Cobia 15 (under construction)
-
hairymick
- Design Reviewer
- Posts: 1965
- Joined: Wed Jan 04, 2006 8:54 am
- Type of boat I like: <-- Please read instructions to the left and delete this text. Then, tell us what type boat you like! :-)
- Location: Queensland, Australia
- Contact:
G'day Okie,
Here is what I did on my Wadefish build. Works pretty good but there is a lot of work in them.
viewtopic.php?t=667
Here is what I did on my Wadefish build. Works pretty good but there is a lot of work in them.
viewtopic.php?t=667
Regards,
Mick
JEMWATERCRAFT Swampgirl; Wadefish;Touring Pirogue;South Wind; P5 ;
Laker X 2, Sasquatch 16.5 T-V 15 Okwata 15:
Cobia 15 (under construction)
Mick
JEMWATERCRAFT Swampgirl; Wadefish;Touring Pirogue;South Wind; P5 ;
Laker X 2, Sasquatch 16.5 T-V 15 Okwata 15:
Cobia 15 (under construction)
-
dangermouse01
- Posts: 200
- Joined: Mon Jul 31, 2006 6:32 pm
- Type of boat I like: <-- Please read instructions to the left and delete this text. Then, tell us what type boat you like! :-)
- Location: Palm Bay, FL (east coast)
Odd shaped hatches can be harder to get a good seal on, as opposed to the standard oval, round, trapezoidal or rectangular shaped. It would also decrease the space available to get things thru the hatch opening.okie07 wrote:if your going to make a custom kayak, i would think that you would wont the hole kayak to be custom. in my mind a kayak fore my wife would have a heart shaped hatch.(made with love).
Not saying the heart shape wont work, but I would look at doing the heart thing with a decal, lamination, inlay, onlay, paint, wood burning or something other than the hatch itself.
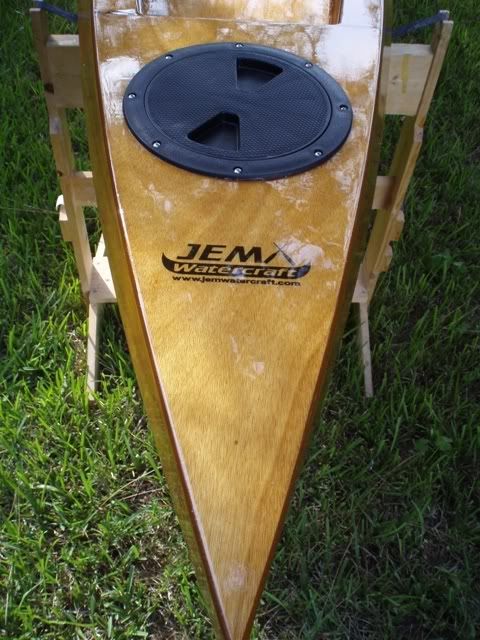
Heres a picture of the JEM logo I added to my Wadefish 2.0, not a decal, but printed on heavy silky paper and laminated between the wood and the glass cloth.
DM
-
Kayak Jack
- Design Reviewer
- Posts: 1186
- Joined: Sun Jun 20, 2004 8:03 pm
- Type of boat I like: <-- Please read instructions to the left and delete this text. Then, tell us what type boat you like! :-)
- Location: South-central Michigan
Here's another idea, Pkio07, don't cut holes in your pretty boat. Load under the decks from the cockpit. Lighter weight, less expensive, and simpler construction. If the decks are deep, I tie a simple line to the first items stuffed in. Pulling that upsets the load and it all comes out easily.
Kayak Jack
Doing what you like is FREEDOM
Liking what you do is HAPPINESS
I spent most of my money on whiskey and women - and I'm afraid I just wasted the rest.
Doing what you like is FREEDOM
Liking what you do is HAPPINESS
I spent most of my money on whiskey and women - and I'm afraid I just wasted the rest.
-
Oldsparkey
- Design Reviewer
- Posts: 1272
- Joined: Sat Jun 19, 2004 11:08 am
- Type of boat I like: Wood boats .
- Location: Somewhere around Central Florida
- Contact:
Unlike Jack I have bulkheads and hatches in my kayak.
When using it for camping I pack it and have a system where I know the location of the items , If a single item is needed then I remove that hatch and retrieve it depending on its location in the kayak.
They are a good way to store stuff when in camp , the hatches are critter proof and offer security for your items unlike leaving them in a open boat.
The hatches have never leaked and the storage areas in the bow and stern stay bone dry when secured , even in a driving rain.
I have gotten a few drops of water in there when removing the hatch to get something and it is raining but standing over the hatch usually only lets a drop or two get in there.
By the way on one trip when I was coming home with the kayak on the top of the vehicle I drove for over two hours in a hard rain at 60 mph and arrive at home checked the kayak , bone dry inside it. Even the travel cover for the cockpit keep the water out.
I guess having hatches or not having them is like everything else in this world , it boils down to a persons likes or dislikes. It does take some nerve to make that short series of started holes in the deck and then saw the hatch out , I was worried but they turned out just like they should.
If a slight mistake is made , when the hatch goes back on it fits right in since it was one unit to start with.
Chuck.
When using it for camping I pack it and have a system where I know the location of the items , If a single item is needed then I remove that hatch and retrieve it depending on its location in the kayak.
They are a good way to store stuff when in camp , the hatches are critter proof and offer security for your items unlike leaving them in a open boat.
The hatches have never leaked and the storage areas in the bow and stern stay bone dry when secured , even in a driving rain.
I have gotten a few drops of water in there when removing the hatch to get something and it is raining but standing over the hatch usually only lets a drop or two get in there.
By the way on one trip when I was coming home with the kayak on the top of the vehicle I drove for over two hours in a hard rain at 60 mph and arrive at home checked the kayak , bone dry inside it. Even the travel cover for the cockpit keep the water out.
I guess having hatches or not having them is like everything else in this world , it boils down to a persons likes or dislikes.
If a slight mistake is made , when the hatch goes back on it fits right in since it was one unit to start with.
Chuck.
Remember:
Amateurs built the Ark...... Professionals built the Titanic
Visit some fine paddlers at The Southern Paddler
Amateurs built the Ark...... Professionals built the Titanic
Visit some fine paddlers at The Southern Paddler
-
Kayak Jack
- Design Reviewer
- Posts: 1186
- Joined: Sun Jun 20, 2004 8:03 pm
- Type of boat I like: <-- Please read instructions to the left and delete this text. Then, tell us what type boat you like! :-)
- Location: South-central Michigan
If you choose hatches, and if you want the heart design, here are some ideas for you to consider.
Size and location of a hatch is a balancing act. Too close to a stem end, and it has to be small because of the narrow profile of the boat. Too close to the center of the boat where it can be large, and you may have difficulty reaching an item in the nether end. Centrally placed along the length of a cargo bay seems least worst compromise.
Shape can be almost any smooth sided geometrical shape. An oblong hatch provides better access for entry and removal of out sized items. One end of that oblong, near the stem end, has to be smaller, but the other end can be larger.
If you want that heart design, there is a cake baking trick you might employ. Draw a square, then draw a circle of the same diameter as the square width. Cut the circle in half and place the halves on the square to shape out a heart. Lay this template on the deck where a hatch will be, and draw around it. Carefully (BEFORE epoxy application) stain this heart darker than the surrounding wood.
Carefully measure and mark where you want your hatch. It will likely overlap the heart, no problem. Cut the hatch. Build a lip under the deck, all the way around the perimeter. Could be 1/8" plywood, 2 " wide with 1" overhanging into the hole, and the other 1" glued securely under the deck. Apply your sealing material to this lip.
Attach your straps etc. to secure the hatch in place. The heart design will be there, and so will the hatch.
Kayak Jack
Doing what you like is FREEDOM
Liking what you do is HAPPINESS
I spent most of my money on whiskey and women - and I'm afraid I just wasted the rest.
Doing what you like is FREEDOM
Liking what you do is HAPPINESS
I spent most of my money on whiskey and women - and I'm afraid I just wasted the rest.